Lineart Tidbits
This tutorial assumes you are familiar with the basics of using layers (and Photoshop in general). It is written for Photoshop 7.0 and up. Please note that there's always more than one way to do things in Photoshop, and I am merely sharing a few tidbits of knowledge in the hopes that others might find them helpful.
If you ever find yourself wanting to color another artist's lineart (with his/her permission of course) and use the coloring method described below, this information may be of some use to you.
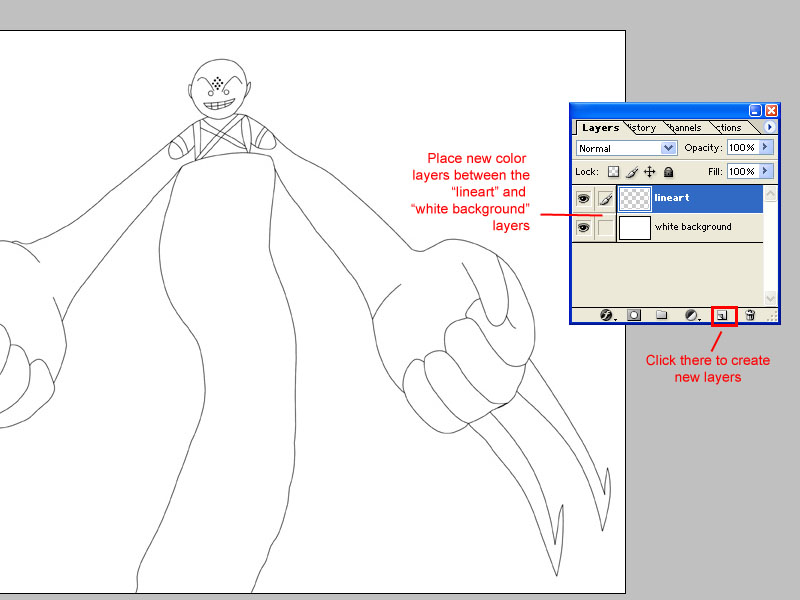
A common method for coloring in Photoshop is to create a top lineart layer, a bottom background layer, and then to create one or more layers in between the two to color on.
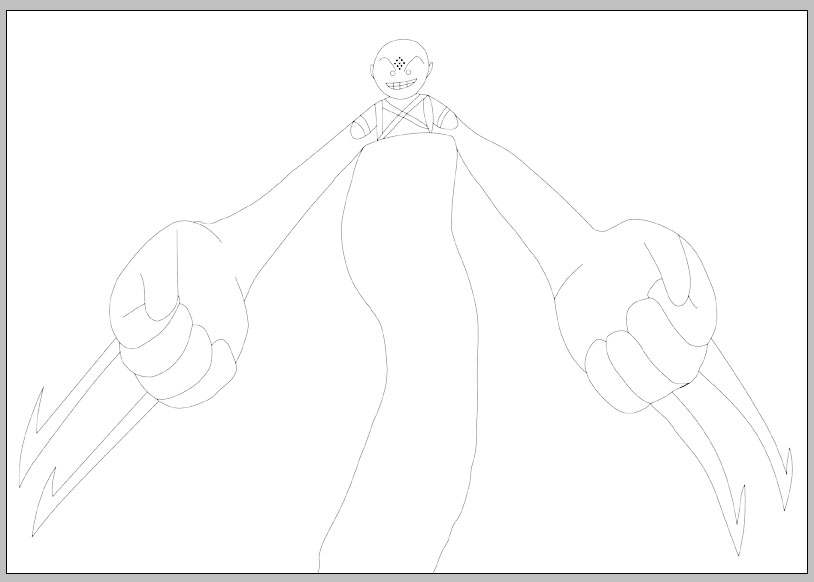
Let's say we have a picture with cleaned BLACK lineart already prepped for us to color. For lack of permission to use a better example, we shall use one of my pieces:

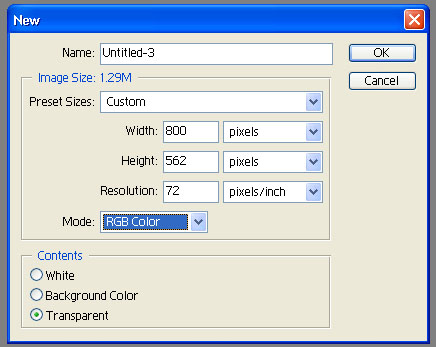
Start by copying and pasting the image into a new file in Photoshop. Have the mode set to "RGB Color" and "Contents" set to "Transparent." Personally, I always, always use transparent (for every new file in Photoshop) and then fill in background colors in layers later (rather than starting with a white or black background). I have found this setting easiest for me.
Alright, we have the picture set up in a new file. What next?
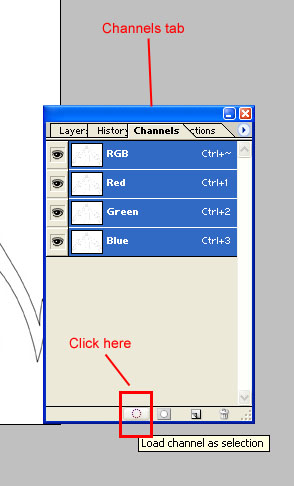
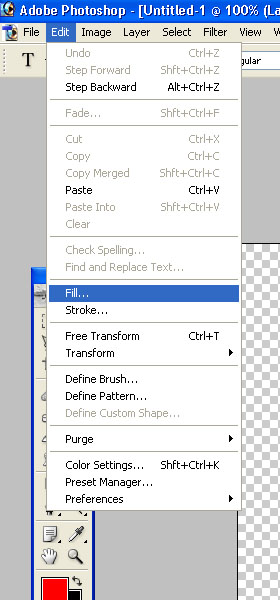
Go to the "Chanels" tab and click on "Load channel as a selection."
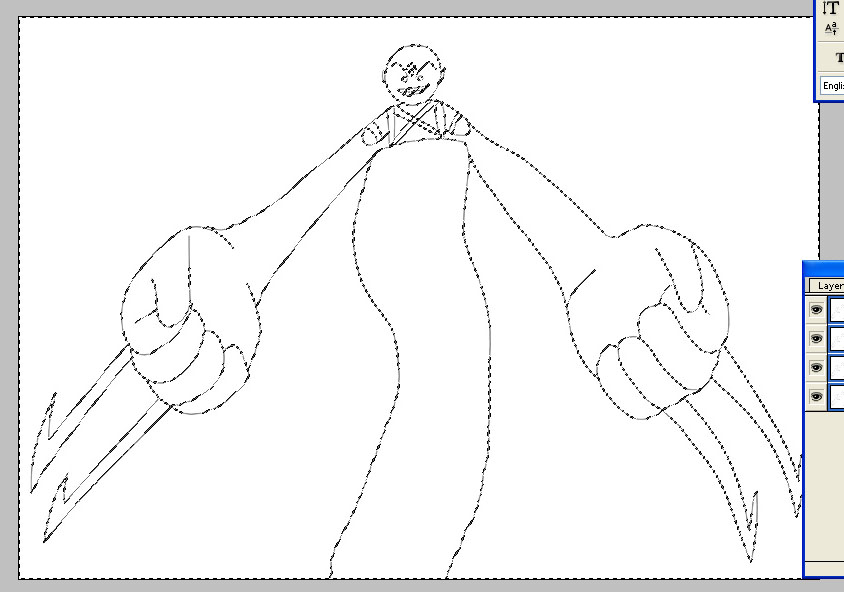
The loaded selection should look like this:
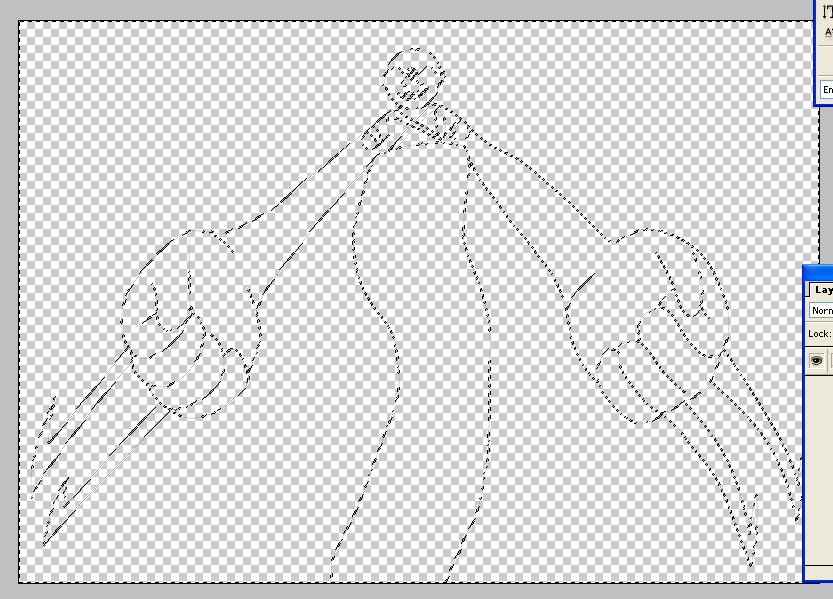
Click on the "Delete" key. We now have this mess:
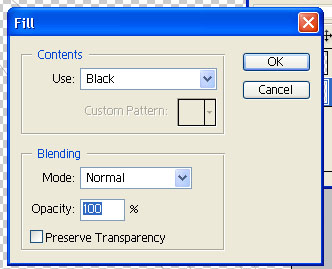
Hit Ctrl+D to deselect. Create a new layer and place it below the layer that contains the lineart. I should probably name the layers now so I'll name the one that has the lineart "lineart" and this new one as "white background." Fill the "white background" layer with black. Yes, black.
Why black for the white background? We want to check for something, and this is the easiest way to do such a check-we'll change the background color shortly. If you fill the background layer with black and you don't see ALL black, you have lineart with fringe pixels. Like so:
![]()
What's wrong with fringe pixels? Although they are not so pronunced in this pic (as you would see if you decided to start coloring right away), they might be in other lineart pieces, and those fringe pixels can become quite noticeable on your lineart layer when coloring in lower layers. I encountered such a thing when coloring work by a couple of other artists. Of course, if you do see all black, then you have no fringe pixels and can skip on to changing the background color to white and start coloring the layers in between, if you want.
Side note on the background fill: in this particular case, if we had filled it with white first, we would have seen that we've also thinned out our lineart as well:
While we can change that by another method (if we want) I will describe later, for now, we will continue along the route of having filled with the black background first since what we're about to do will resolve the matter as is.
As I was saying, we do not see all black but instead an outline of fringe pixels of the lineart. We can change this by selecting the lineart layer and going to Layer --> Matting --> Remove White Matte
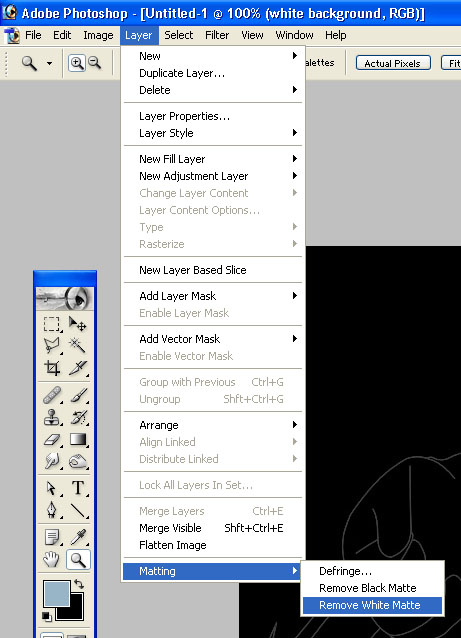
Now it should be all black:

And NOW we can fill the "white background" layer with white. And voila! Our lineart is ready for us to start coloring.
It may (and hopefully does) look the same as when you first copy/pasted the image, but now when coloring in lower layers, you won't see any fringe pixels in the top lineart layer. Yay!
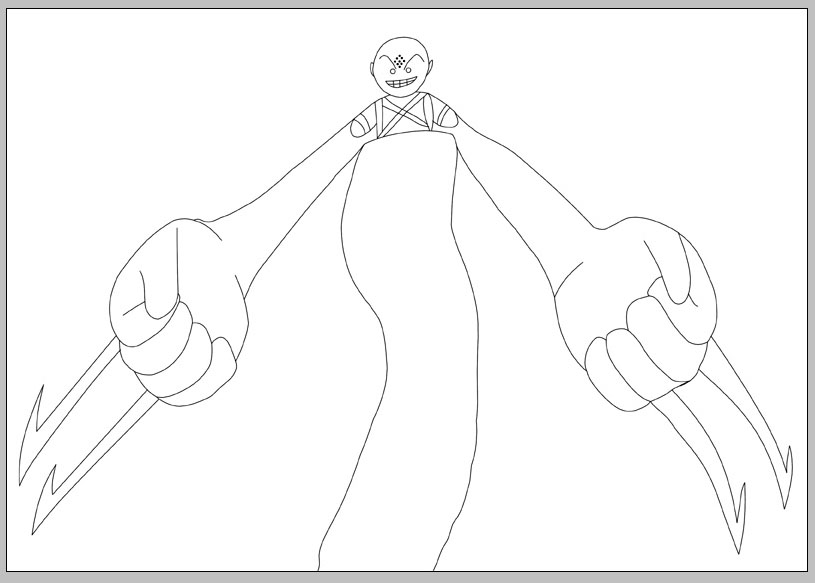
If you read this whole thing thoroughly, I mentioned another way to handle thinned lineart, so here it is. Here's our thinned lineart:
This is not necessarily a bad thing and may even be desired for some people, but let's say that we do in fact want more solid black lineart. Assuming that we have already separated our lineart and background color into different layers, hold down the ctrl key and click on the lineart layer (if you are using Photoshop CS2, be sure to click on the thumbnail display of the layer).

Go to Edit --> Stroke. Use these settings (1px, black, center)

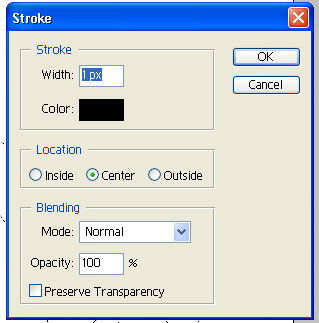
Hit Ctrl + D to deselect. Now our lineart is no longer thinned (and if it doesn't have any fringe pixels, we can start coloring):
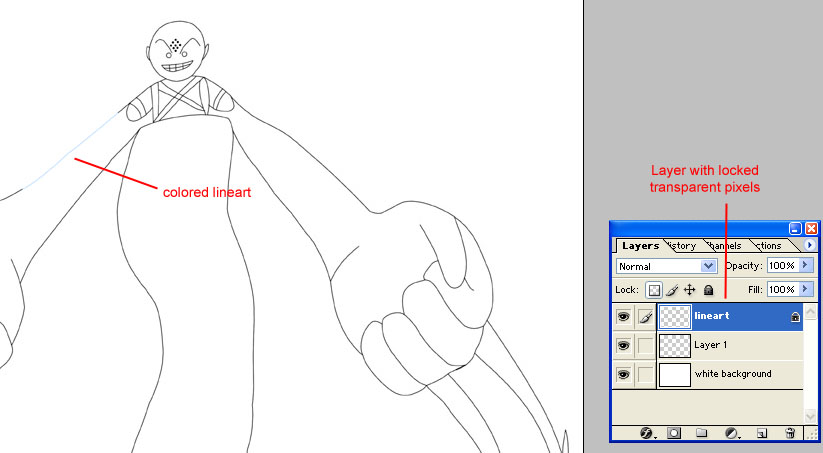
Another helpful thing to know about lineart is using the "lock transparent pixels feature."
![]()
Let's say we want to keep our lineart, but we don't want to keep it black. This step is usually done after coloring the lower layers, but I just want to focus on lineart in this tutorial. Click on the "lock transparent pixels" button (displayed in the above image). Now pick a color that isn't black. I'm going to pick a light blue and color a small part of one of the water arms. Pick the brush tool and color the part of the lineart you want to change.
I'm not going to do the whole pic, as that should get the general principle across.
Thus concludes my tidbits. I hope this info is helpful to somebody somewhere down the line.