Preparing the Clouded Gradient
Click on the Foreground Color.
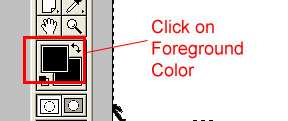
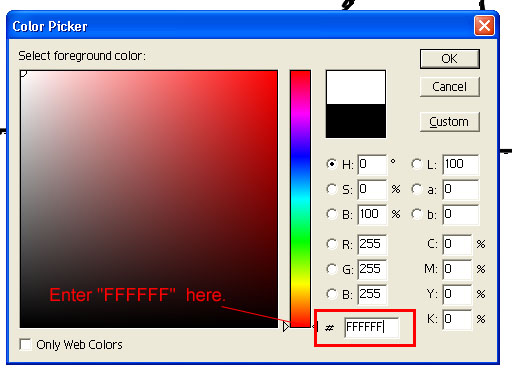
Set it to White by entering "FFFFFF" by the # sign. Then hit "OK."
Click on the Background Color.
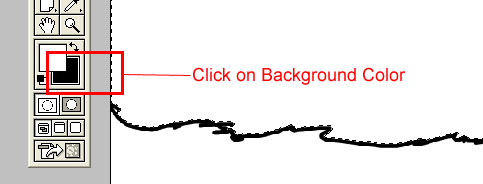
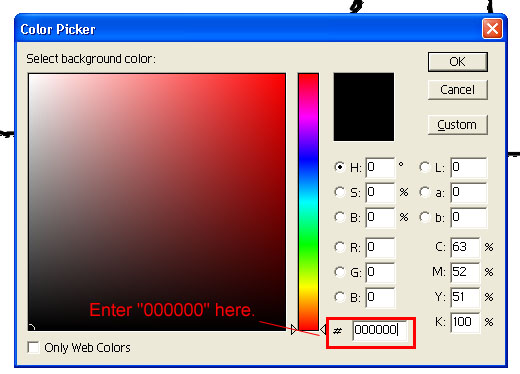
Set it to Black by entering "000000" by the # sign. Then hit "OK."
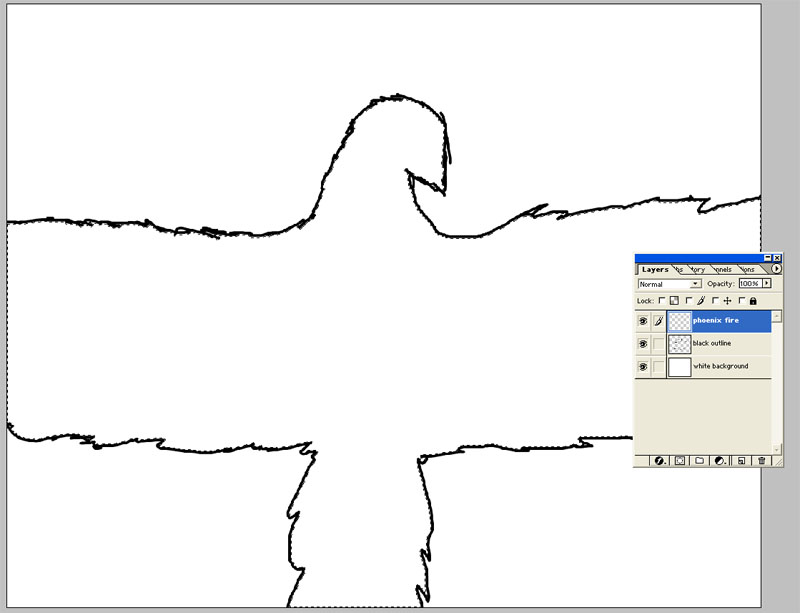
Create a New Layer and name it "phoenix fire." Make sure this is the layer selected as you complete the next step.
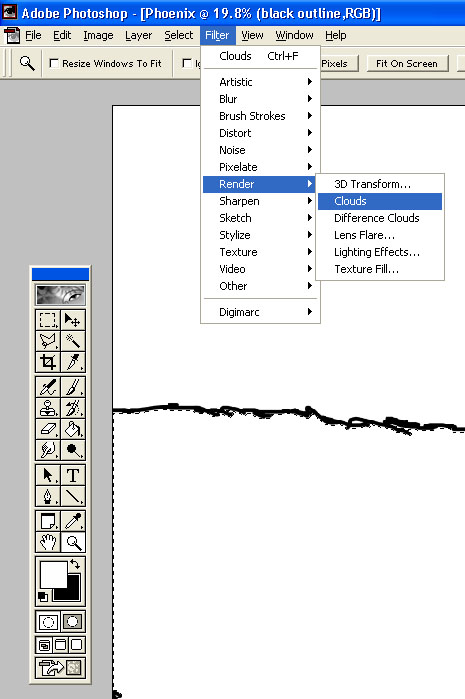
Go to Filter --> Render --> Clouds
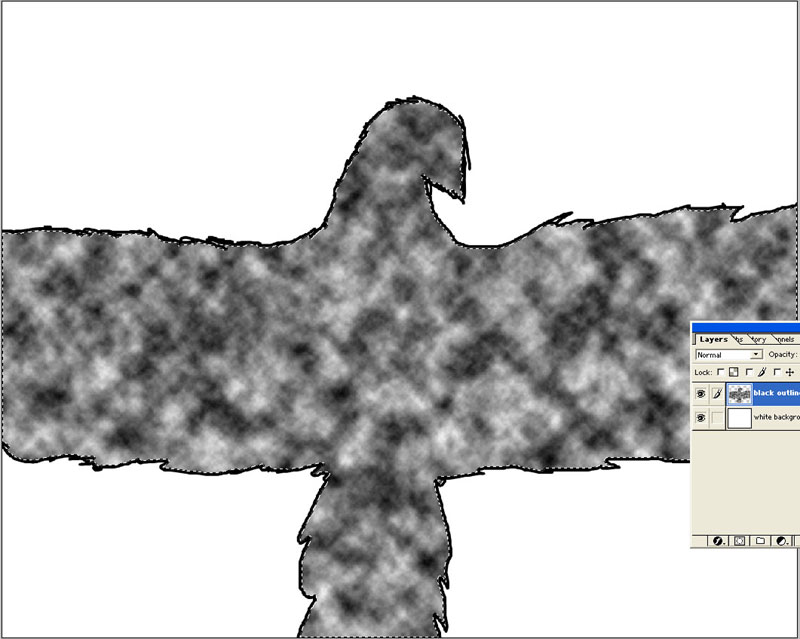
The Phoenix should now look something like this:
Unfortunately, I had not saved at all, and got an error in Photoshop when I was about to save one of my screenshots. So, all the images from now on will be based on a different outline.
Important note: the above image has a mistake. The clouds should be on a separate layer, NOT on the same layer as the black outline.
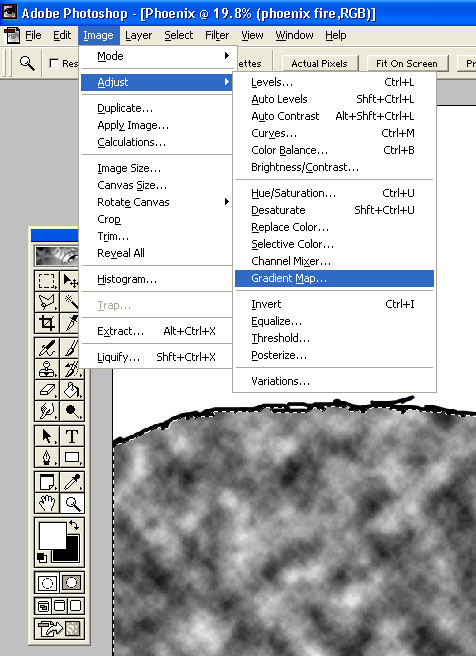
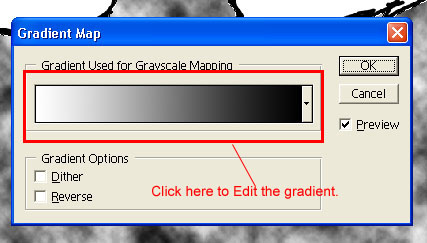
Go to Image --> Adjust --> Gradient Map.
This is the trickiest part, and I'll do my best to explain. When I first bring up the Gradient Map, here's how my options look. If I click on the gradient itself, I can edit the colors that are used for it.
Here's how my Gradient Editor looks at first.
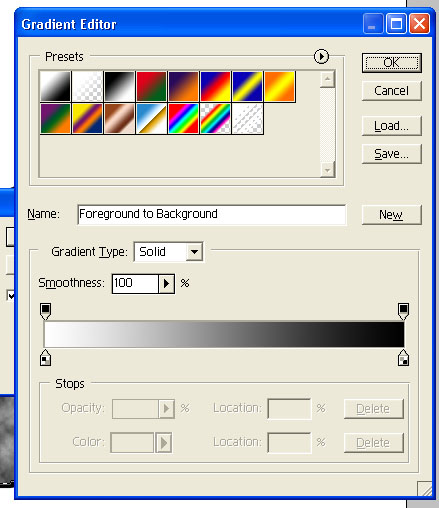
I'm new to this part of Photoshop, but I'll explain it as best I can. We are concerned with the gradient in the rectangle, that currently shows the progressive change from white to black. On each end, on the bottom of this rectangle, we have things called Color Stops. If we choose the Color Stop on the left, the option to change the color becomes available, as indicated by "Color:" no longer being grayed out. The Color Midpoint is the middle of the gradient's progression and indicated by a small diamond between the color stops. If we wanted more white than black in the gradient, we would move this diamond to the right. The items on the top of the gradient rectangle, that look just like Color Stops, are called Opacity Stops. We will not be using these.
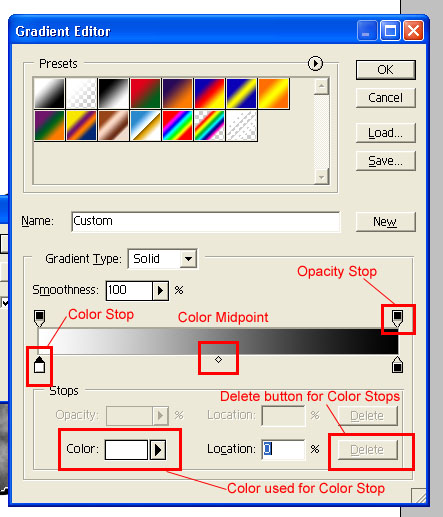
As you move your cursor along the bottom of the gradient rectangle between a Color Stop and the Color Midpoint, the cursor will most likely switch from a white arrow to a small white hand. If you click while the cursor is a small hand, you will create a new Color Stop. If you do this by accident (as I often do), simply click on the new unwanted Color Stop and then click on the "Delete" button (found to the right of the lower "Location:" option), and it will go away. We will intentionally create a new Color Stop shortly. Also, if these settings are not already true, make sure Gradient Type is Solid and Smoothness is at 100%.
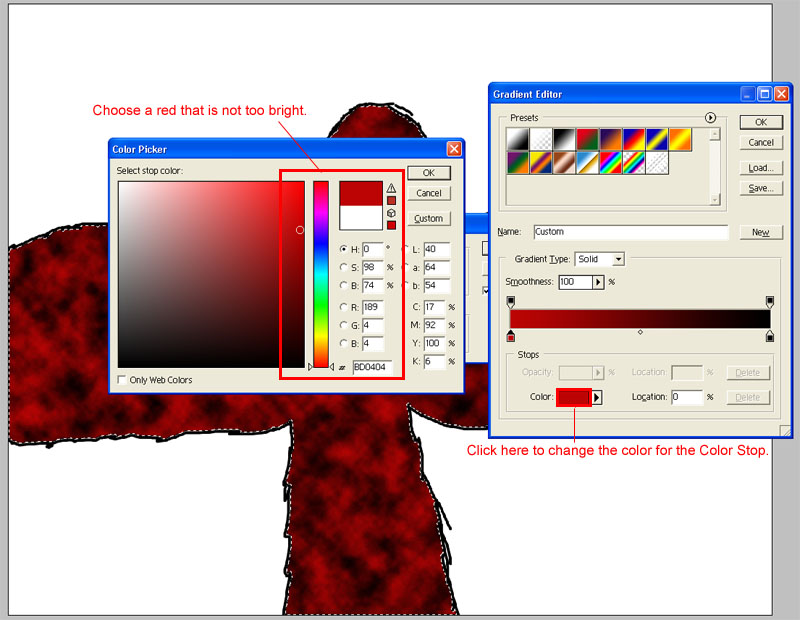
Click on the left Color Stop and pick a nice, deep, red that is not too bright. Hit "OK" in the Color Picker.
Click on the right Color Stop and pick the brightest variation of yellow you can get. Hit "OK" in the Color Picker.
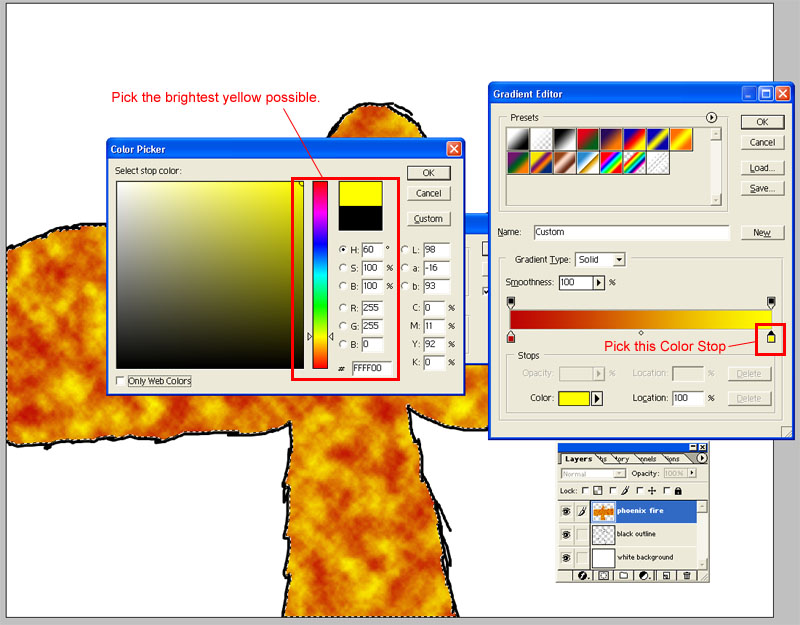
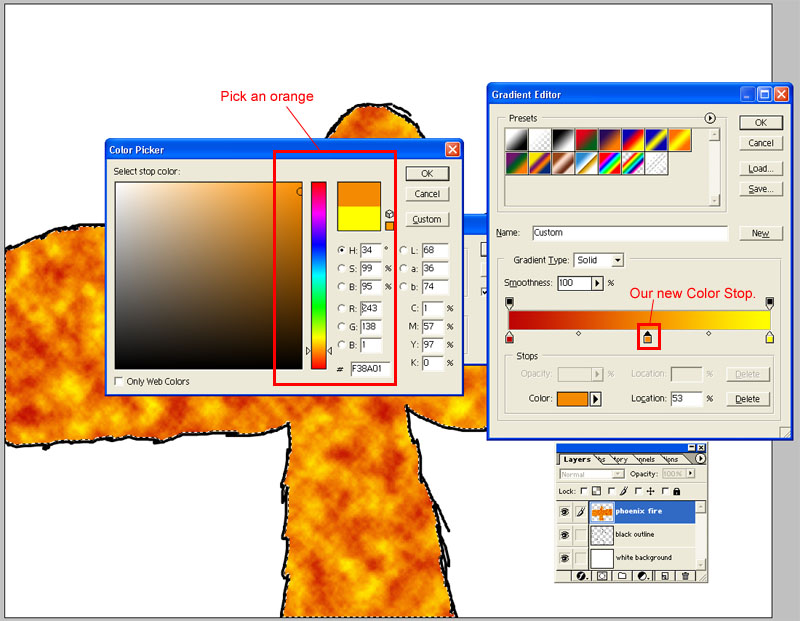
Place your cursor along the bottom of the gradient rectangle, between a Color Stop and the Color Midpoint. When it changes into a little hand, click on it. You have now created a new Color Stop (that is probably yellow, just like the one we just edited). Now click on the new Color Stop, and then click on on the box by "Color:" to change this Color Stop to orange.
With three color stops, we have two Color Midpoints. Pick the Color Midpoint between the orange color stop and the yellow color stop. Shift it whichever way you want. I want only a little bit of yellow, so I shifted it a fair way to the right. Pick the Color Midpoint between the red color stop and the orange color stop. Shift it whichever way you want. I want mostly red and orange for my phoenix, but mostly orange, so I shifted a little to to the left. My gradient now looks like this:
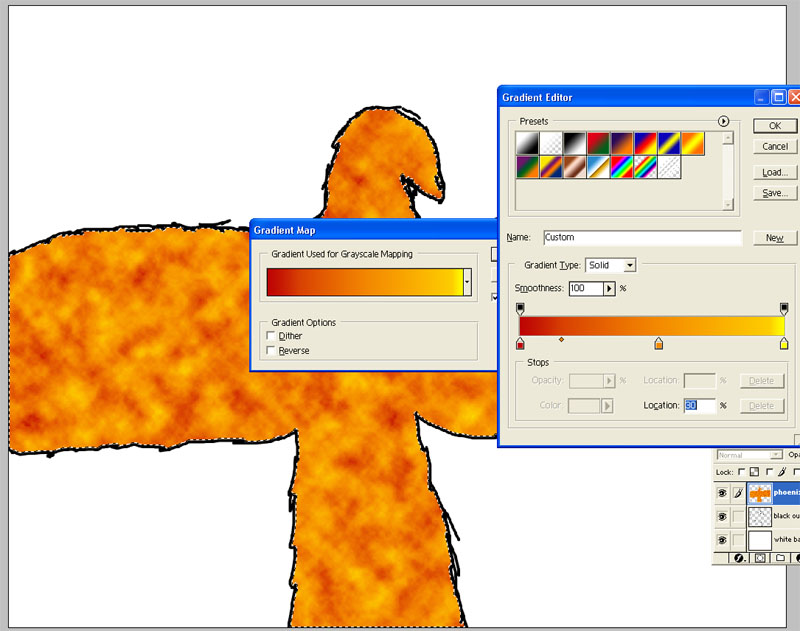
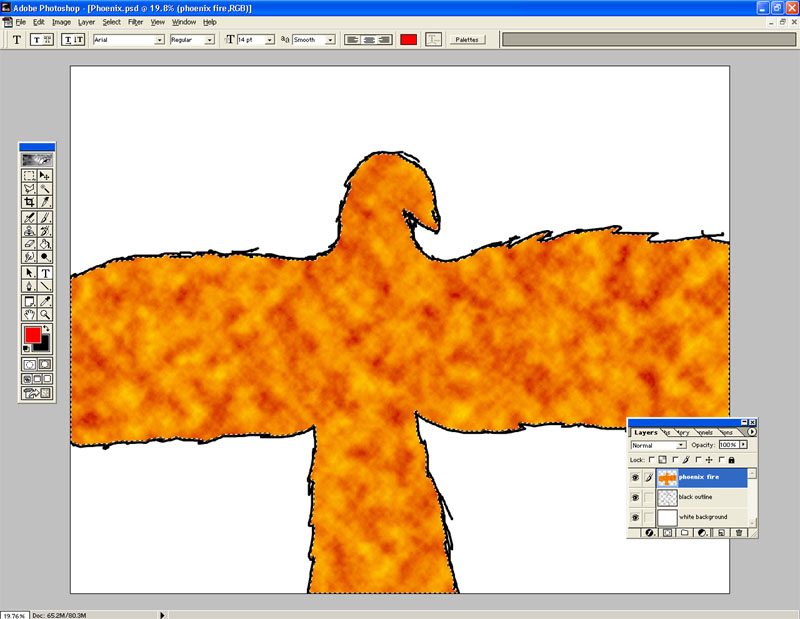
When you are done picking your gradient, hit "OK" in the Gradient Editor and then hit "OK" again for the Gradient Map. Here's how my image looks at this point:
Important note: My other phoenix seems to have been mostly orange and red with little or perhaps even no yellow to speak of. The gradient can also use only two color stops, one for red and one for orange, with the color midpoint closer to to the red (indicating there would be more orange).